
Film Photography: Ilford XP2 Super, samples and review .

Film Photography
Ilford xp2 super
ISO 400 35mm film
Nikon F90x
Nigel Borrington
In yesterdays post I talked a little about how film based photograph is now back a big way! with many of the film manufacturers having over the last few years seen a big jump in their sales figures. Many films that had disappeared from the photography market have now started to be produced again, Kodak are event about to re-introduce their world famous Ektachrome film, a high resolution positive film used at a commercial level of photography in the past.
It is now possible for the first time in many years to get online and purchase any type or speed of film, from Colour to Black and white, ISO 50 to ISO 3200
. This is a big opportunity for film loves to regain long lost skills, such as black and white film processing at home, setting up a dark room studio using chemical based film processing and printing. If this is not for you however, you can still opt for just purchasing the type of film you want to try out and once you have exposed your full roll, you can send it in the post to processors such as Lomography, who process any type of film for about the same price as it cost way back in the original film days.
One film I always love using was Ilfords XP2 Super, ISO 400, black and white film, Its a C41 processed film which is the same processing methods used with colour films. This film can be exposed at camera ISO setting between 50 to 800 as described in the instructions that come in the box, ISO 400 is the optimum setting but if the film is exposed at setting that overexpose the film, the film grain visible on the final prints will be much reduced. If you do play around with your ISO setting, you have to remember that with film you have to specify to your development lab that you did so and tell them what ISO Setting you exposed the roll of film at, also unlike digital for each of the 24 or 36 exposures on your roll of film you have to stay with the same ISO setting all the way through the roll.
ILFORD XP2 Super PDF
Like all rolls of film, XP2 Super has its own grain look and texture, you can see from the image below that the grain is very visible in the more well lighted areas on the frame. Its not unpleasant and adds lots of character to the image, this is an ISO 400 film after all and as such perfect for use indoors.

Ilford XP2 Super – Sample images, scanned using a Minolta Dimage Elite film scanner


Nikon AF-d 50mm f1.4 Prime lens, one lens all day …..

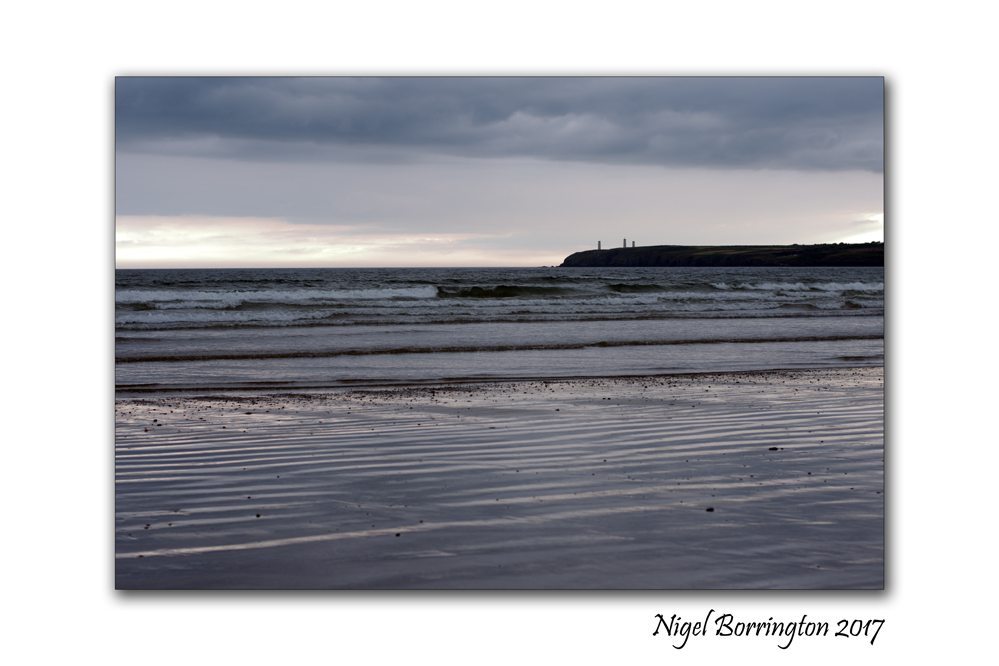
Tramore Strand
One lens all day
Nikon AF-d 50mm f1.4
Nigel Borrington
Irish Landscapes
Its easy to think that the best lens to spend a full day of Photography with would be a zoom lens, however my favorite and most respected lenses are all prime lenses(fixed focus lenght lenses).
One of my most respected and trusted lens is my Nikon 50mm f1.4, its fast , can work very well in low light and even at 75mm on my DX D7200 body (50mm on an FX) it makes me think in a very creative way. You have to frame you shots well before you click the shutter button, I find this much more creative that just walking around and zooming in and out at everything 🙂 although this can be a very fun experience.
While you need a zoom lens in order to make sure you can capture some subjects, Prime lenses make you think about the subject you want to capture!
So what kind of images can you produce if you only take one lens with you , A 50mm Prime?
Nikon AF-d 50mm f1.4 Gallery
These images from yesterday include a morning walk and then an evening walking alone the strand at Tramore, County Waterford


Irish Photographer Francis Browne and his lucky escape from the RMS Titanic …..

Francis Browne’s pictures of the Titanic
April 14th 1912
Francis Browne’s Finest Pictures
In 1985 an Edward O’Donnell was searching in the basement at the Irishjesuit Provincial’s House when he came across a large black metal trunk, in it he found a large colletion of negative albums, photographs and most amazingly of all an album containing photographs of Titanic’s voyage.
All these photographs were the work of Francis Browne who died in 1960 and was almost forgotten by this time. Subsequent investigations revealed he had enjoyed worldwide fame in 1912 when his photographs of the Titanic’s journey to Cobh were published worldwide. He had travelled first class to Cobh having been given a ticket by his uncle Robert Browne, Bishop of Cloyne. His remarkable pictures proved to be unique.
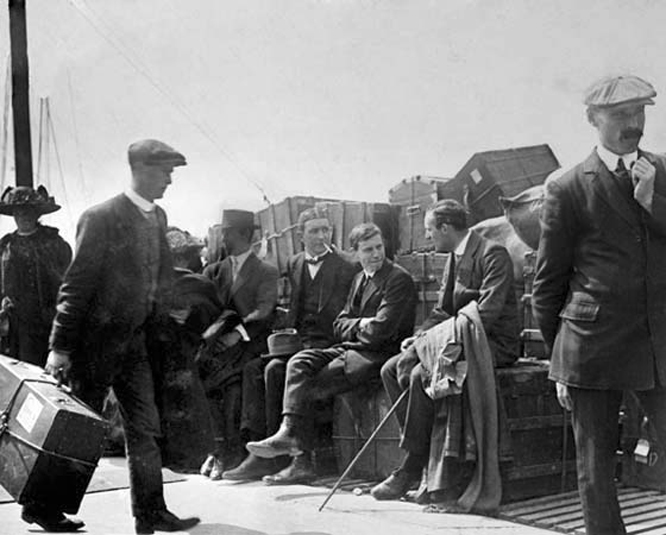
So it was that Frank was presented with a first class ticket for the Maiden Voyage of the Titanic to bring him as far as Cobh. The morning of the 12th.April 1912 he arrived at Waterloo Station in London to catch the Titanic Special. He immediately started taking photographs, first recording the train journey and then life aboard the Titanic on the initial section of the voyage. Having made friends with a wealthy American family he was offered a ticket for the remaining part of the journey and no doubt excitedly telegraphed a request for permission to go on to New York, to which he received the terse response “Get Off That Ship——Provincial!” That telegram not only saved Frank’s life but also meant that this unique record of the voyage was saved for posterity and guaranteed overnight fame for Frank Browne.
Browne later described the event as “the only time holy obedience saved a man’s life.”
“Get Off That Ship——Provincial!” – I guess many have wondered about this instruction ? , its almost prophetic in its nature – I guess we will never know how or why it was such a strong and clear order . I think it relates to the fact that while many embraced the new-world of 1912 technology, many also stood in fear of it and in this case clearly for good reason.
Frank Browne , April 1912 – Titanic Gallery


When Dorothea Lange Visited Ireland in 1954
![Dorothea Lange A Chat at the O’Halloran Farm [Ireland]](https://nigelborrington.com/wp-content/uploads/2015/04/dorothea-lange-a-chat-at-the-o_halloran-farm.jpeg)
Dorothea Lange A Chat at the O’Halloran Farm [Ireland]
It is amazing the range of her photography work and telling just how brave and out there she was to capture the vast majority of her subjects. During the great depression in the USA she captured the massive Migrant of farmers from east to west (Dorothea Lange : Migrant Farm Families ).
I have studied much of her great depression images and I am in love and have total admiration with them as a body of work, a hugely important historic study !!!!
One body of Dorothea’s work that I have until recently not looked at, is here images of 1950’s Ireland, I have shared a couple here, living in Ireland for this last ten years or so I have visited and photographed many of the locations she visited – so its wonderful to see these images and amazing to compare just how much life and these places has changed.
I am only starting to collect some books and look at the images from her 1954 Irish visit, however as you cam see the b
lack and white film images she took at just amazing !!!!
![Dorothea Lange Michael Kenneally on His 30 Acres [Ireland]](https://nigelborrington.com/wp-content/uploads/2015/04/dorothea-lange-ireland.jpeg)
Dorothea Lange Michael Kenneally on His 30 Acres [Ireland]
Using Classic Lenses, Yashica DX 35mm f2.8

Yashica 35mm m42
Using classic lenses
Nigel Borrigton
Yashica DX 35mm f2.8, M42 Lens
Over the years I have collected a few classic camera lenses, the Yashica f35mm f2.8 m42 lens has to be one of my most valued and liked.
Back in the 1960’s this lens would have cost a good amount of cash as it was at the top of Yashica’s Slr lens range, the main reason for this being that it had the then New DX coating and a 35mm focus length was becoming very valued for 35mm film camera.

I use this lens a lot, not all the time but its always at hand if I need it, I think you can see from the images below why.
If I use it on a dx sensor camera it provides for a 50mm focus length, a length that I like a lot for framing landscapes. As for the famed DX coating, well I think that you can see form the images below that it still works very well. The colors and the contrast in these images ( taken last week ), are just great. The images taken facing right at the sun show just how little flair this lens produces.
Gallery


Image processing using Andriod Tablet Software
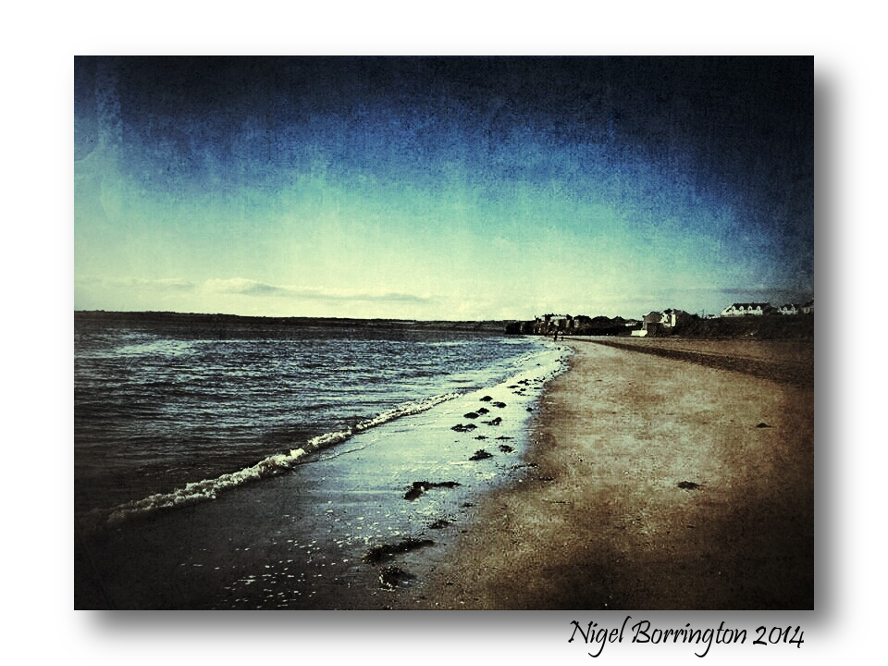
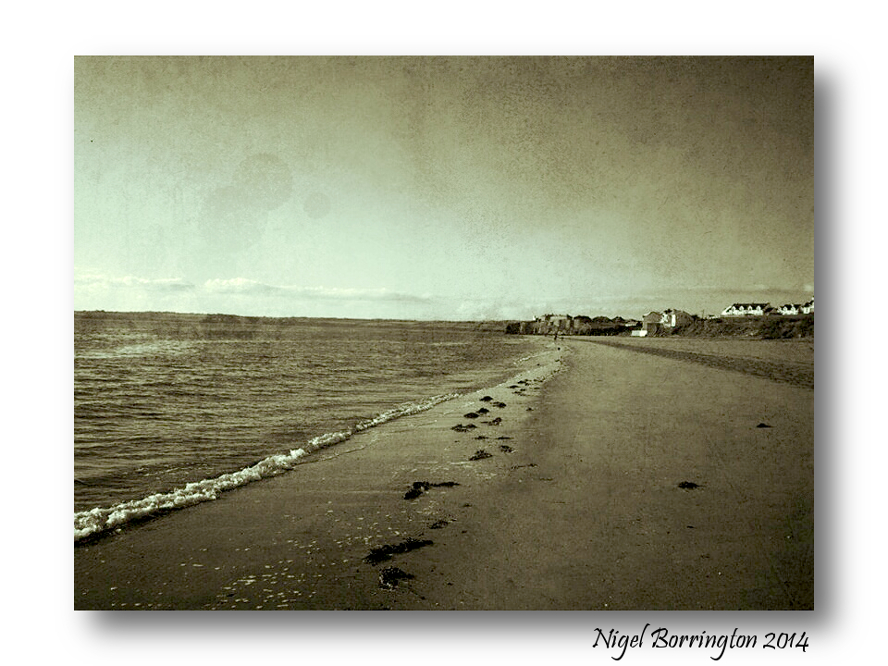
Duncannon Beach
Landscape processed with Spadspeed
Nigel Borrington
For almost all of my digital image processing I use a combination of Photoshop or Paintshop-pro and aftershots-pro software, these applications are perfect to getting the best possible quality from you images. However what about times when you want to be a little more creative with your images, processing them in a more artistic fashion and then sending them to your facebook or blog moments after you have taken them.
Last Saturday I visited the coastal town of Duncannon in county Wexford and took some beach images using both a Fujifilm x100 and a Nuxus 7 Andriod Tablet with and used an app that I downloaded sometime back called Snapspeed to process them . This app is well known and used but I had not used it while at a location before, so decided to give it a go !!!
The images here are all processed using some of the filters and packages available in Spanspeed and I was impressed with how they looked after processing.
I think if your a landscape painter who paints raw outside this little app could give you some great ideas as to how you may end up paint the scene in-front of you. I also love the final images, this application is both great fun and also I feel could well be used to produce some great design images.
Snapspeed Gallery

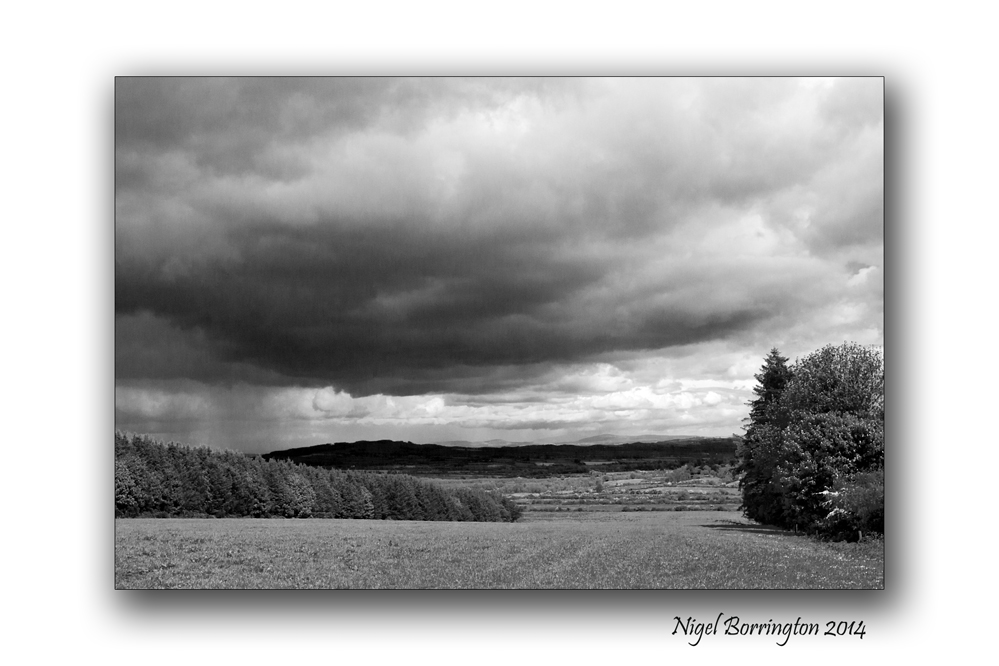
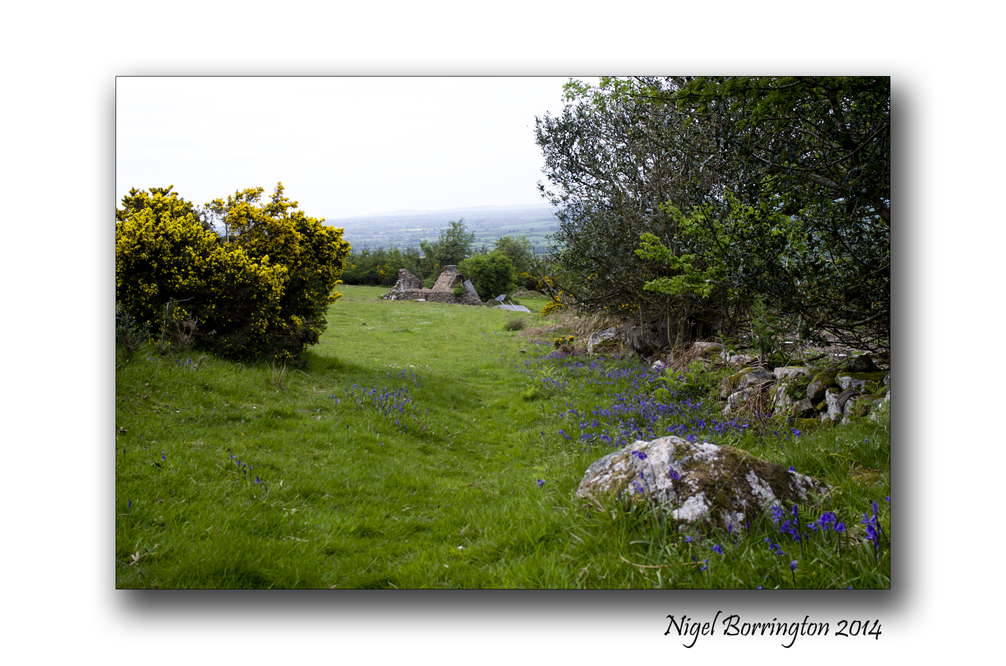
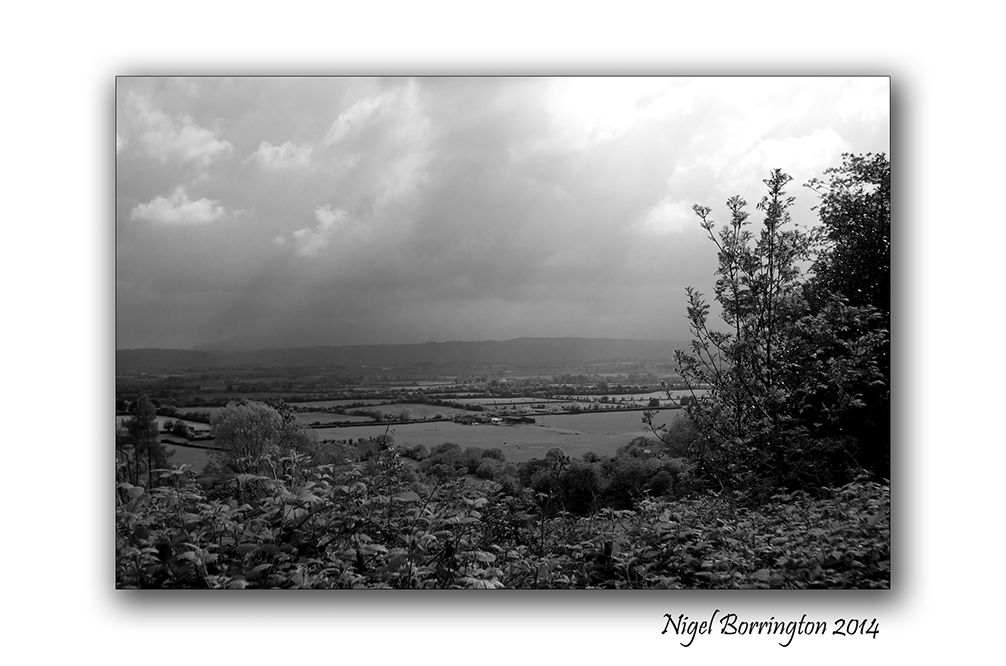
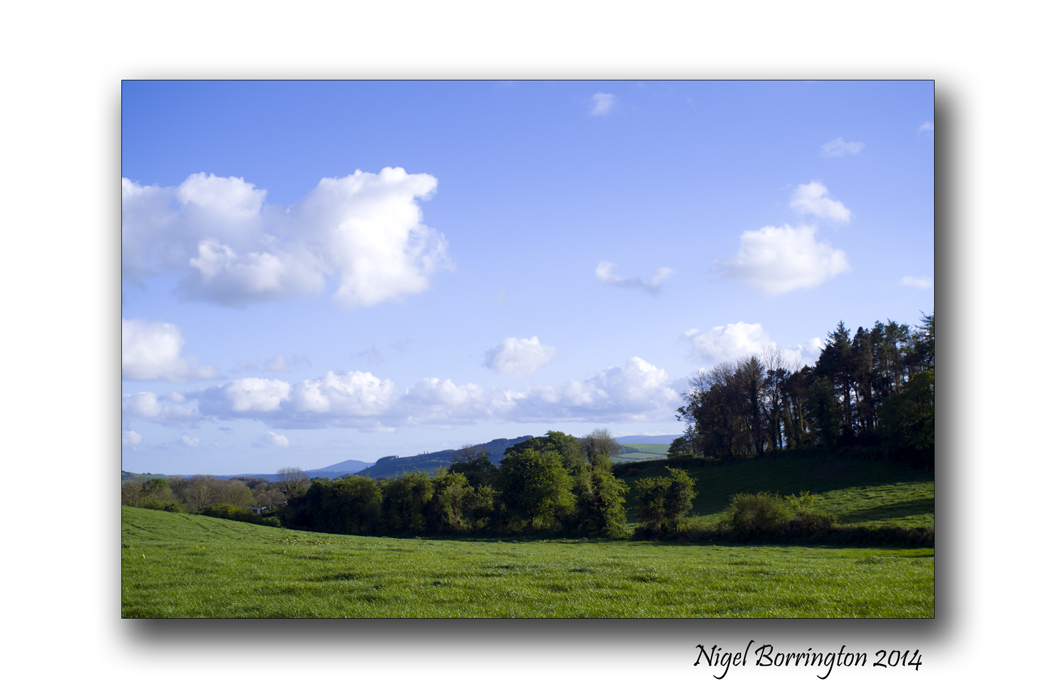
What to do with Green in the landscape ? – using Black and White.
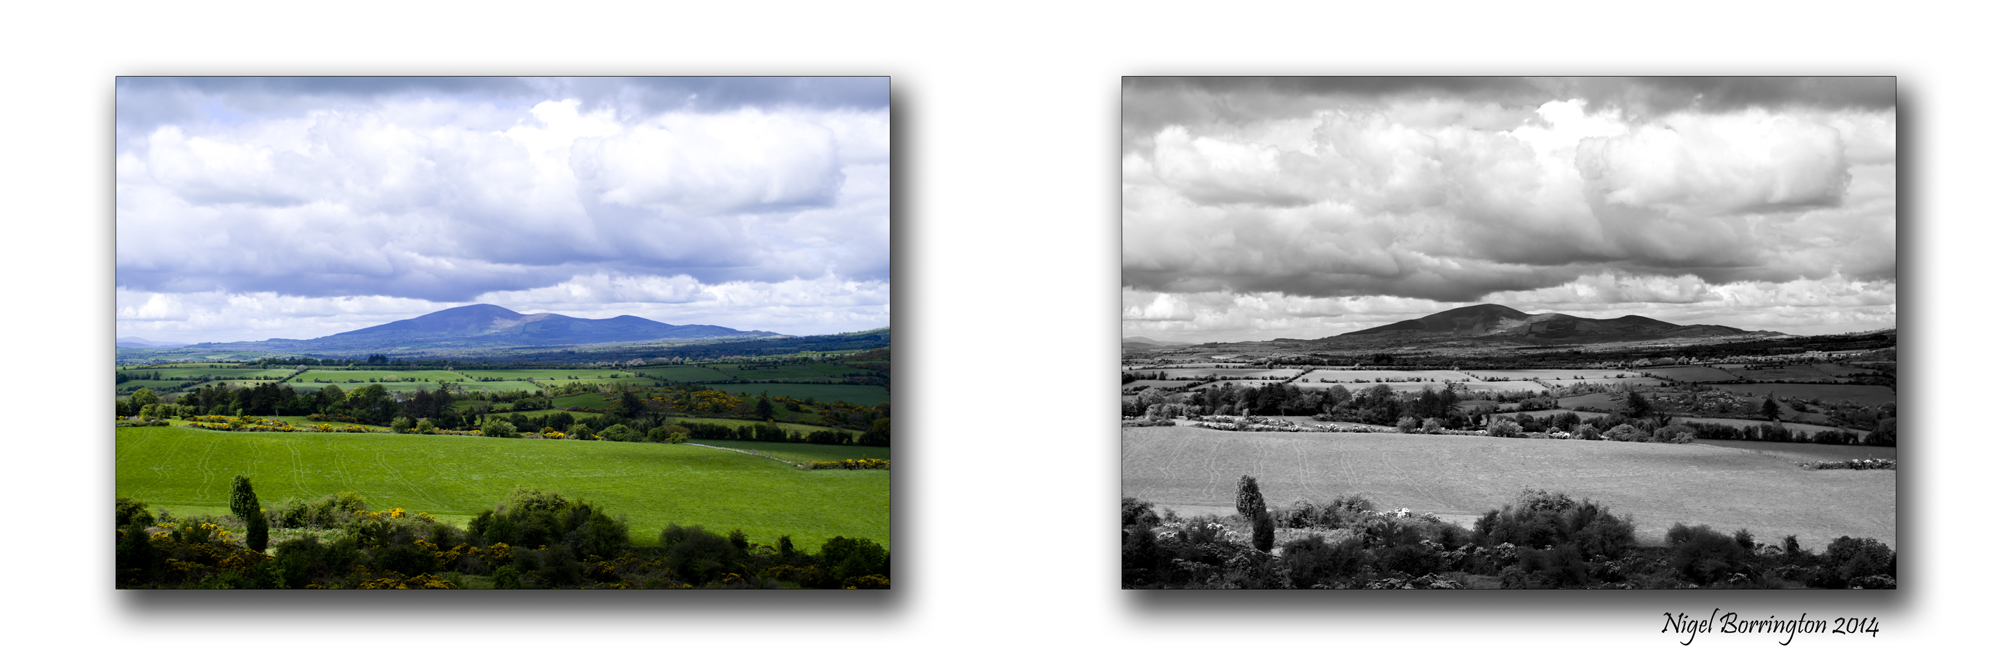
Green in the Landscape, using Black and white
Irish Landscape photography : Nigel Borrington
One of my all-time favourite photographers James Ravilious, once while being interviewed by the BBC said about the colour Green in the Landscape :
“England is a very green country, and “greenness” creates a monotonal view, and one that it’s difficult to achieve much contrast or colour gradation in. Transposing to black and white allows you a richer tone palatte, and to draw attention to the subject more subtly. Black and white contains a bright silver to deep black tone range in landscape images and thus turns a green flat image into a wonderful tonal picture”
This monochrome effect in landscape images is something that has always interested me, Landscape photographers like Ravilious used Black and white film, which when developed correctly in the dark room produces the wonderful tones he talks about.
 River Torridge at Sunrise © James Ravilious
I have worked for a long time to both find landscape subjects and black and white processes that can help in getting me close to the same results.

Woodstock country gardens, County Kilkenny, Photography : Nigel Borrington
Black and white image, processed in photoshop CS6 and taken with a fujifilm X100
This blog contains many of the black and white landscape images I have taken and in the Gallery below I want to use some local Landscape images to show, how landscapes taken in colour can look when processed in Black and white.
I have placed the colour images first followed by the black and white images, have a good look at them, see what you think and comment if you like.
Some photographers don’t get black and white others love it and will only produce images in monochrome.
Green or Black and white Gallery


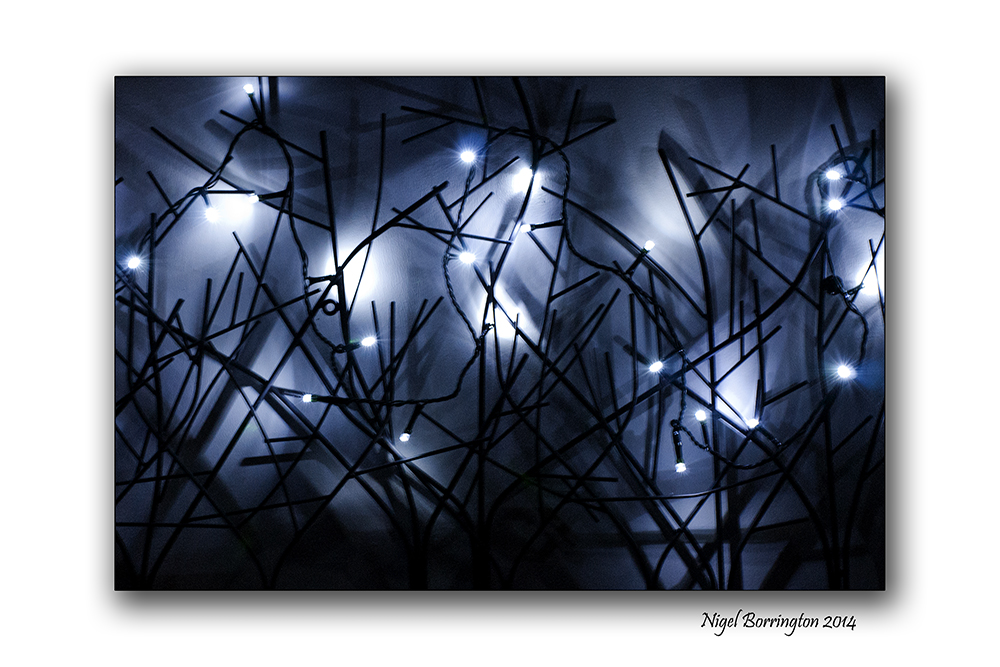
What is Lens Bokeh ?

Led lights and Lens Bokeh
Nigel Borrington
What is Bokeh
Wiki have a great description here : Lens Bokeh
“In photography, bokeh is the aesthetic quality of the blur, in out-of-focus areas of an image. Bokeh has been defined as “the way the lens renders out-of-focus points of light”.
However, differences in lens aberrations and aperture shape cause some lens designs to blur the image in a way that is pleasing to the eye, while others produce blurring that is unpleasant or distracting.
Bokeh is often most visible around small background highlights, such as specular reflections and light sources, which is why it is often associated with such areas.
However, bokeh is not limited to highlights; blur occurs in all out-of-focus regions of the image.”
I have been looking for a way to test this feature of my lenses for a little time, then at Christmas we put up some little led lamps as below. So using two different lenses one a Nikon 50mm f1.8 lens and A Mamiya 45mm f2.8 lens I took some images of the lights, with the lens as out of focus as I could get them.
I think that the images below clearly show the effects that are described in the Wiki link, seeing clearly the effects of the number of aperture blades and their shape.
The Nikon lens as seven blade but they are not curved , the Mamiya lens blades are curved. You can clearly see that the shapes created are very different.
Lens Bokeh examples
Led light used for examples below
.
Mamiya Sekor lens

 .
.
——————-
Nikom AIS Lens


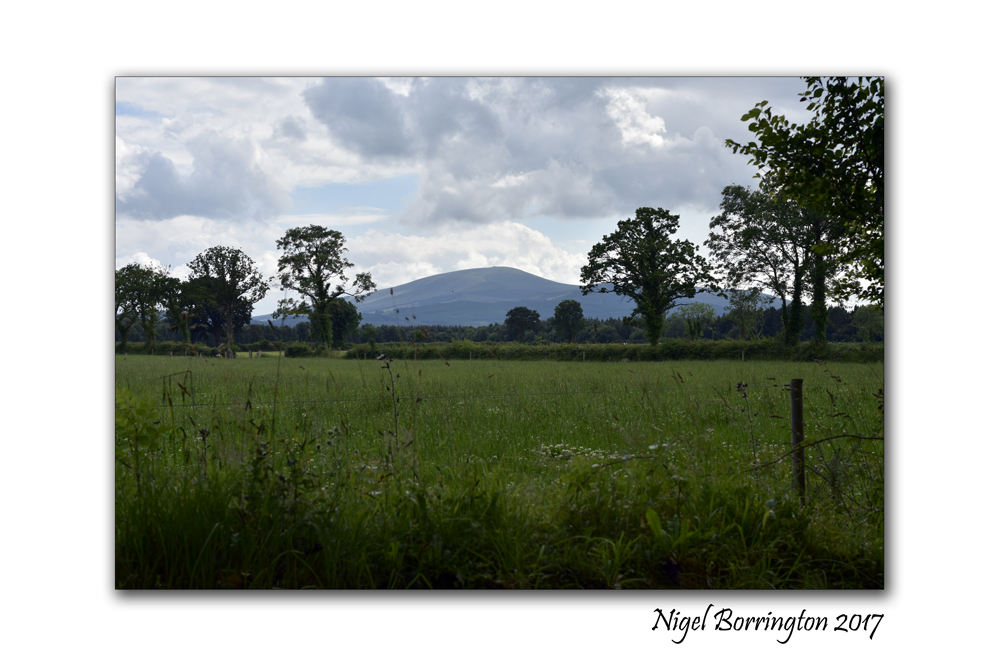
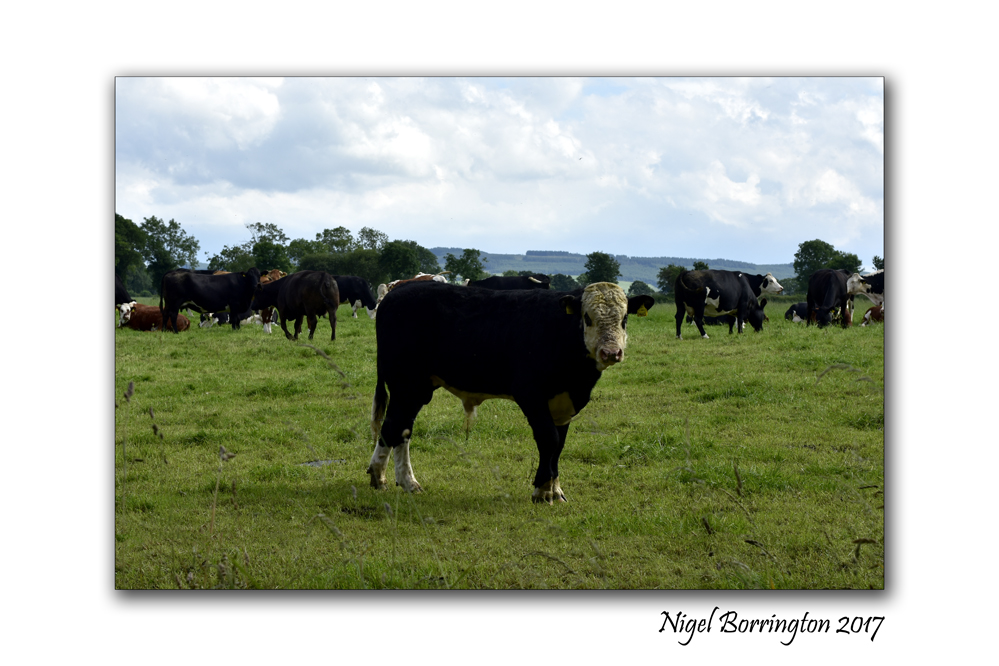
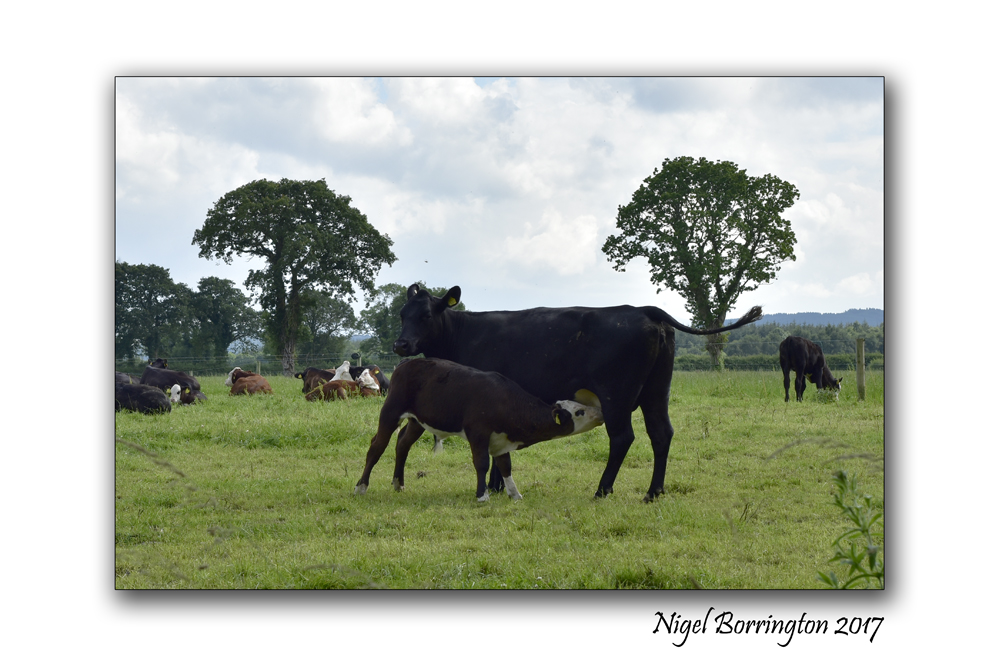
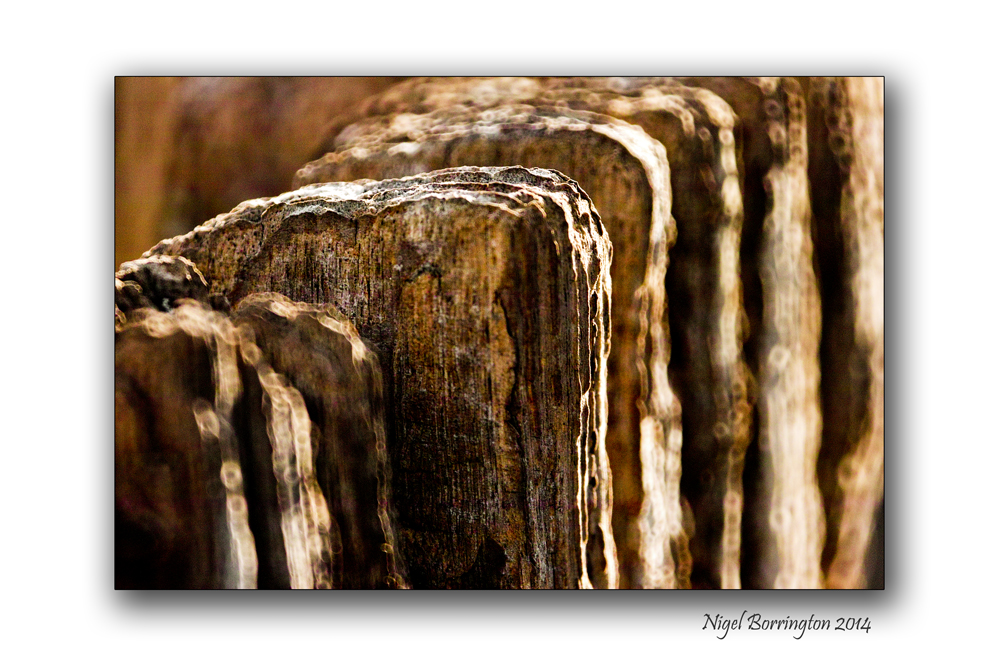
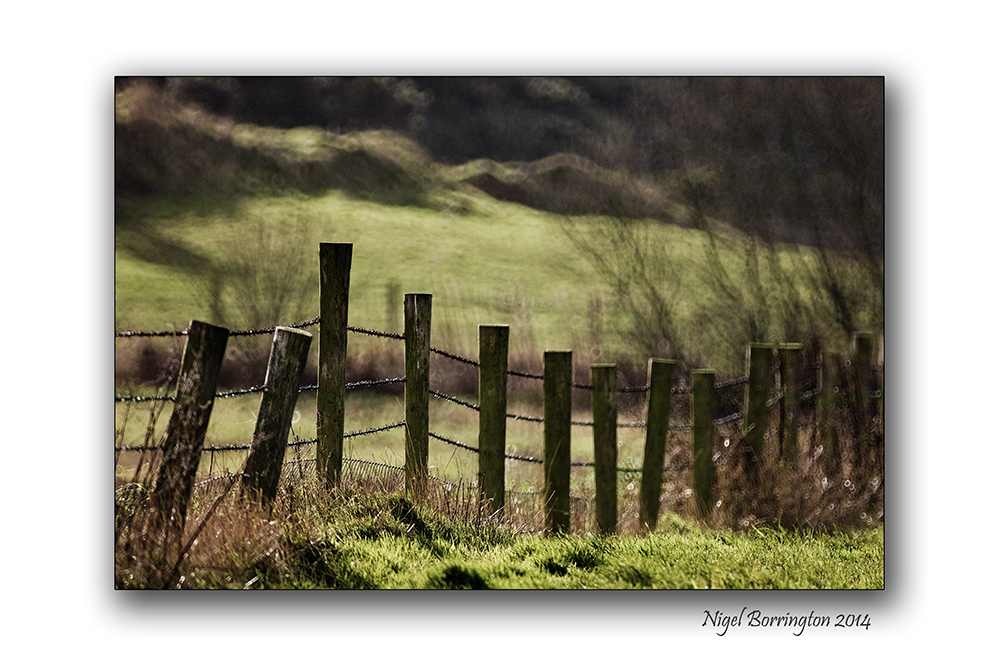
Getting close in the landscape
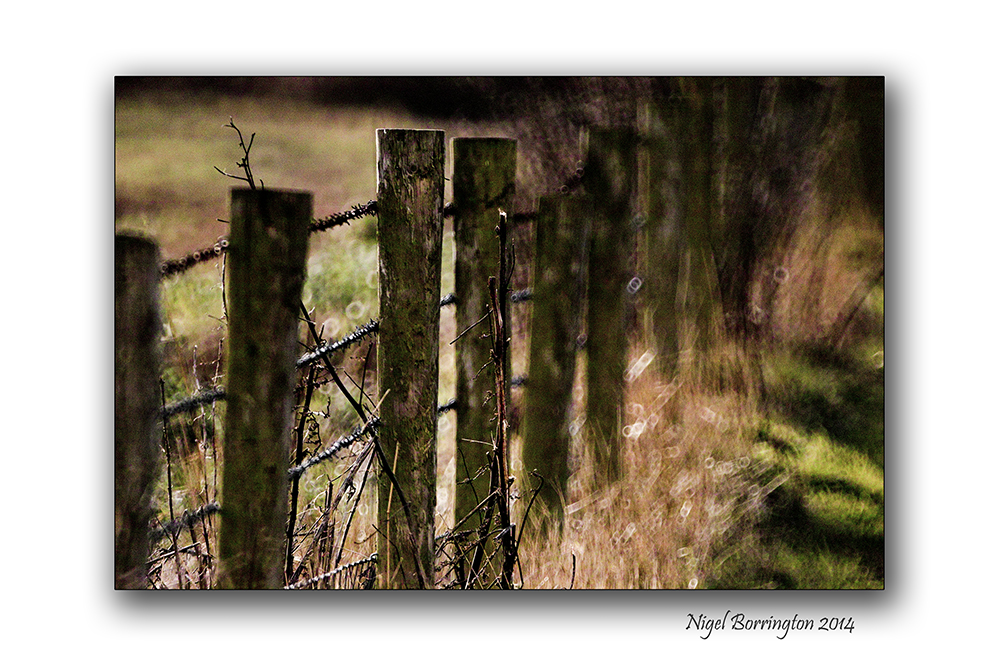
Following the fence
Irish Landscape photography : Nigel Borrington

Way back in 1986 I purchased a Tamron SP500 f8 Mirror (Telephoto) lens from a camera shop in London, it was second hand and cost around £150 back then.
The lens is reviewed very well here : Photozone review
I came across this lens again while sorting out some equipment last week and could not resist taking some images with it, so I put it onto my Sigma x3 camera and took a walk with both through some local fields.
I am not going to reviews the lens as such here as this is done so well in the above review, what I would say however is that this is a manual focus lens that is able and very capable of producing some very detailed and delicate images.
I really enjoyed using it again, if you are looking for a lens that is quick to use then this lens is not for you. If you take your time while creating your images however then this lens offers some very different and interesting results. I very much liked the shallow depth of field, there is something about the design in a mirror lens that produces a very find focus area in the image results.
I also felt that the combination of this lens alongside the sigma x3 sensor, produced some of the closest results to using film that I have noticed while using a digital camera.
The lens is very sharp, it produces wonderful colour and contrast, focuses down to 1.7 meters from the nearest subject and has a very shallow depth of field through out its focus range. Photographers spend a lifetime looking for lenses that have these features along with very distinctive results, if you can give this lens the time to learn how best to use it, I feel you will love it !
These lenses are often for sale on Ebay, if you want to purchases one and try one out !
Gallery

A car boot sale camera – sigma dp1

I found this little camera at the kilkenny car boot sale a couple of weekends ago, it just looked up at me from one of the tables and had a price tag of €50 with the Voigtlander viewfinder.
Its the original 2009 sigma DP1 , (follow the link for details). The stall it was on was a charity stall collecting for Africa so I felt I just had to put my hand in my pockets and hand over the €50.
I had always wanted to try out one of these little cameras but when new they cost a good €800, the reviews never put it in great light but I always had a feeling that it was a little better then the reviewers reported them to be. The somewhat bad reviews have left the second hand prices low.

Last week I put the camera in my bag along with some other of my kit and on the way home stopped off at a local tourist venue. The images below are three images from about fifty I took just as a test of this little camera. I have to say just like the reviews always said its a little old fashioned to use and the poor LCD screen ( in the sun ) makes you use the external viewfinder a lot but it still felt very good to use, a little like using a good film compact camera. The focus is good and the controls and functions are simple to find and quick to change if your use to any high end compact system.
Image quality
So what about the results, well the big reason I had to try this camera was for its sensor, ( A Foveon X3 sensor ) You can read all the details from the link, its the only sensor on the market that captures pure colour at each and everyone of its mega-pixels. All other sensors are monochrome only, with a filter that cuts out (Red, green and blue in turn) for each of a set of three mega-pixel locations in a row, repeated. Thus they do not record colour but only a signal that some colour has come through a filter to them.
The sigma sensor however records pure colour in full and at the intensity at which it reaches the pixel point. This system is as close to film as it comes.
The images below show the results and I have to say I am very impressed, quality wise they are sharp and the colour is wonderful but it was when I did a colour conversion to black and white my eyes were truly opened, if you have done any black and white conversion from raw digital files you will know the work you need to do to get some true film like monochrome contrast back into your images. Not here. The images even at default setting are just wonderful.
I have started each of the below image pairs with the black and white conversion from the original colour image.

Sigma Dp1, iso50
The contrast is just wonderful here, yet nothing is lost between the black of the trees and the sun on the grass…

Sigma Dp1, iso50
The green in the sun-lit grass, along with its detail is fully retained, yet the sky behind the trees has retained a light blue colour and not just overexposed into white.
Sigma Dp1, iso50
Again just look at the contrast in this black and white image, the dynamic range is just amazing, the shadows have just the right detail for a good image, yet the bright areas are not over exposed. This was a very sunny and thus contrast filled day.

Sigma Dp1, iso50
Just look how the colours really pop out of the image, this is as good as landscape slide film was without any photoshop colour post processing. All I did was set what I felt to be the correct exposure in the camera itself. Again and unlike slide film none of the image detail is lost due to the high contrast of this sunny afternoon.
Sigma Dp1, iso50

Sigma Dp1, iso50
Again none of the detail is lost in the above two images and a full range of tones and colours has been recorded.
Image print size
One issue is the actual image size out of the camera, this only being some 5 mega-pixels, but as with many peoples comments on mega-pixel size, more does not equal good quality big prints if the sensor is not recording enough detail, this sensors pixels are recording both sharp images (with as much details that the lens holds) and full direct colour detail. I feel very confident that these images could be printed at least A3 in size and beyond, all you need to print landscape books or books that record a holiday or family event for example.
All in all not a bad find for €50, one I don’t think I will be finding every weekend 🙂
Samuel Coulthurst
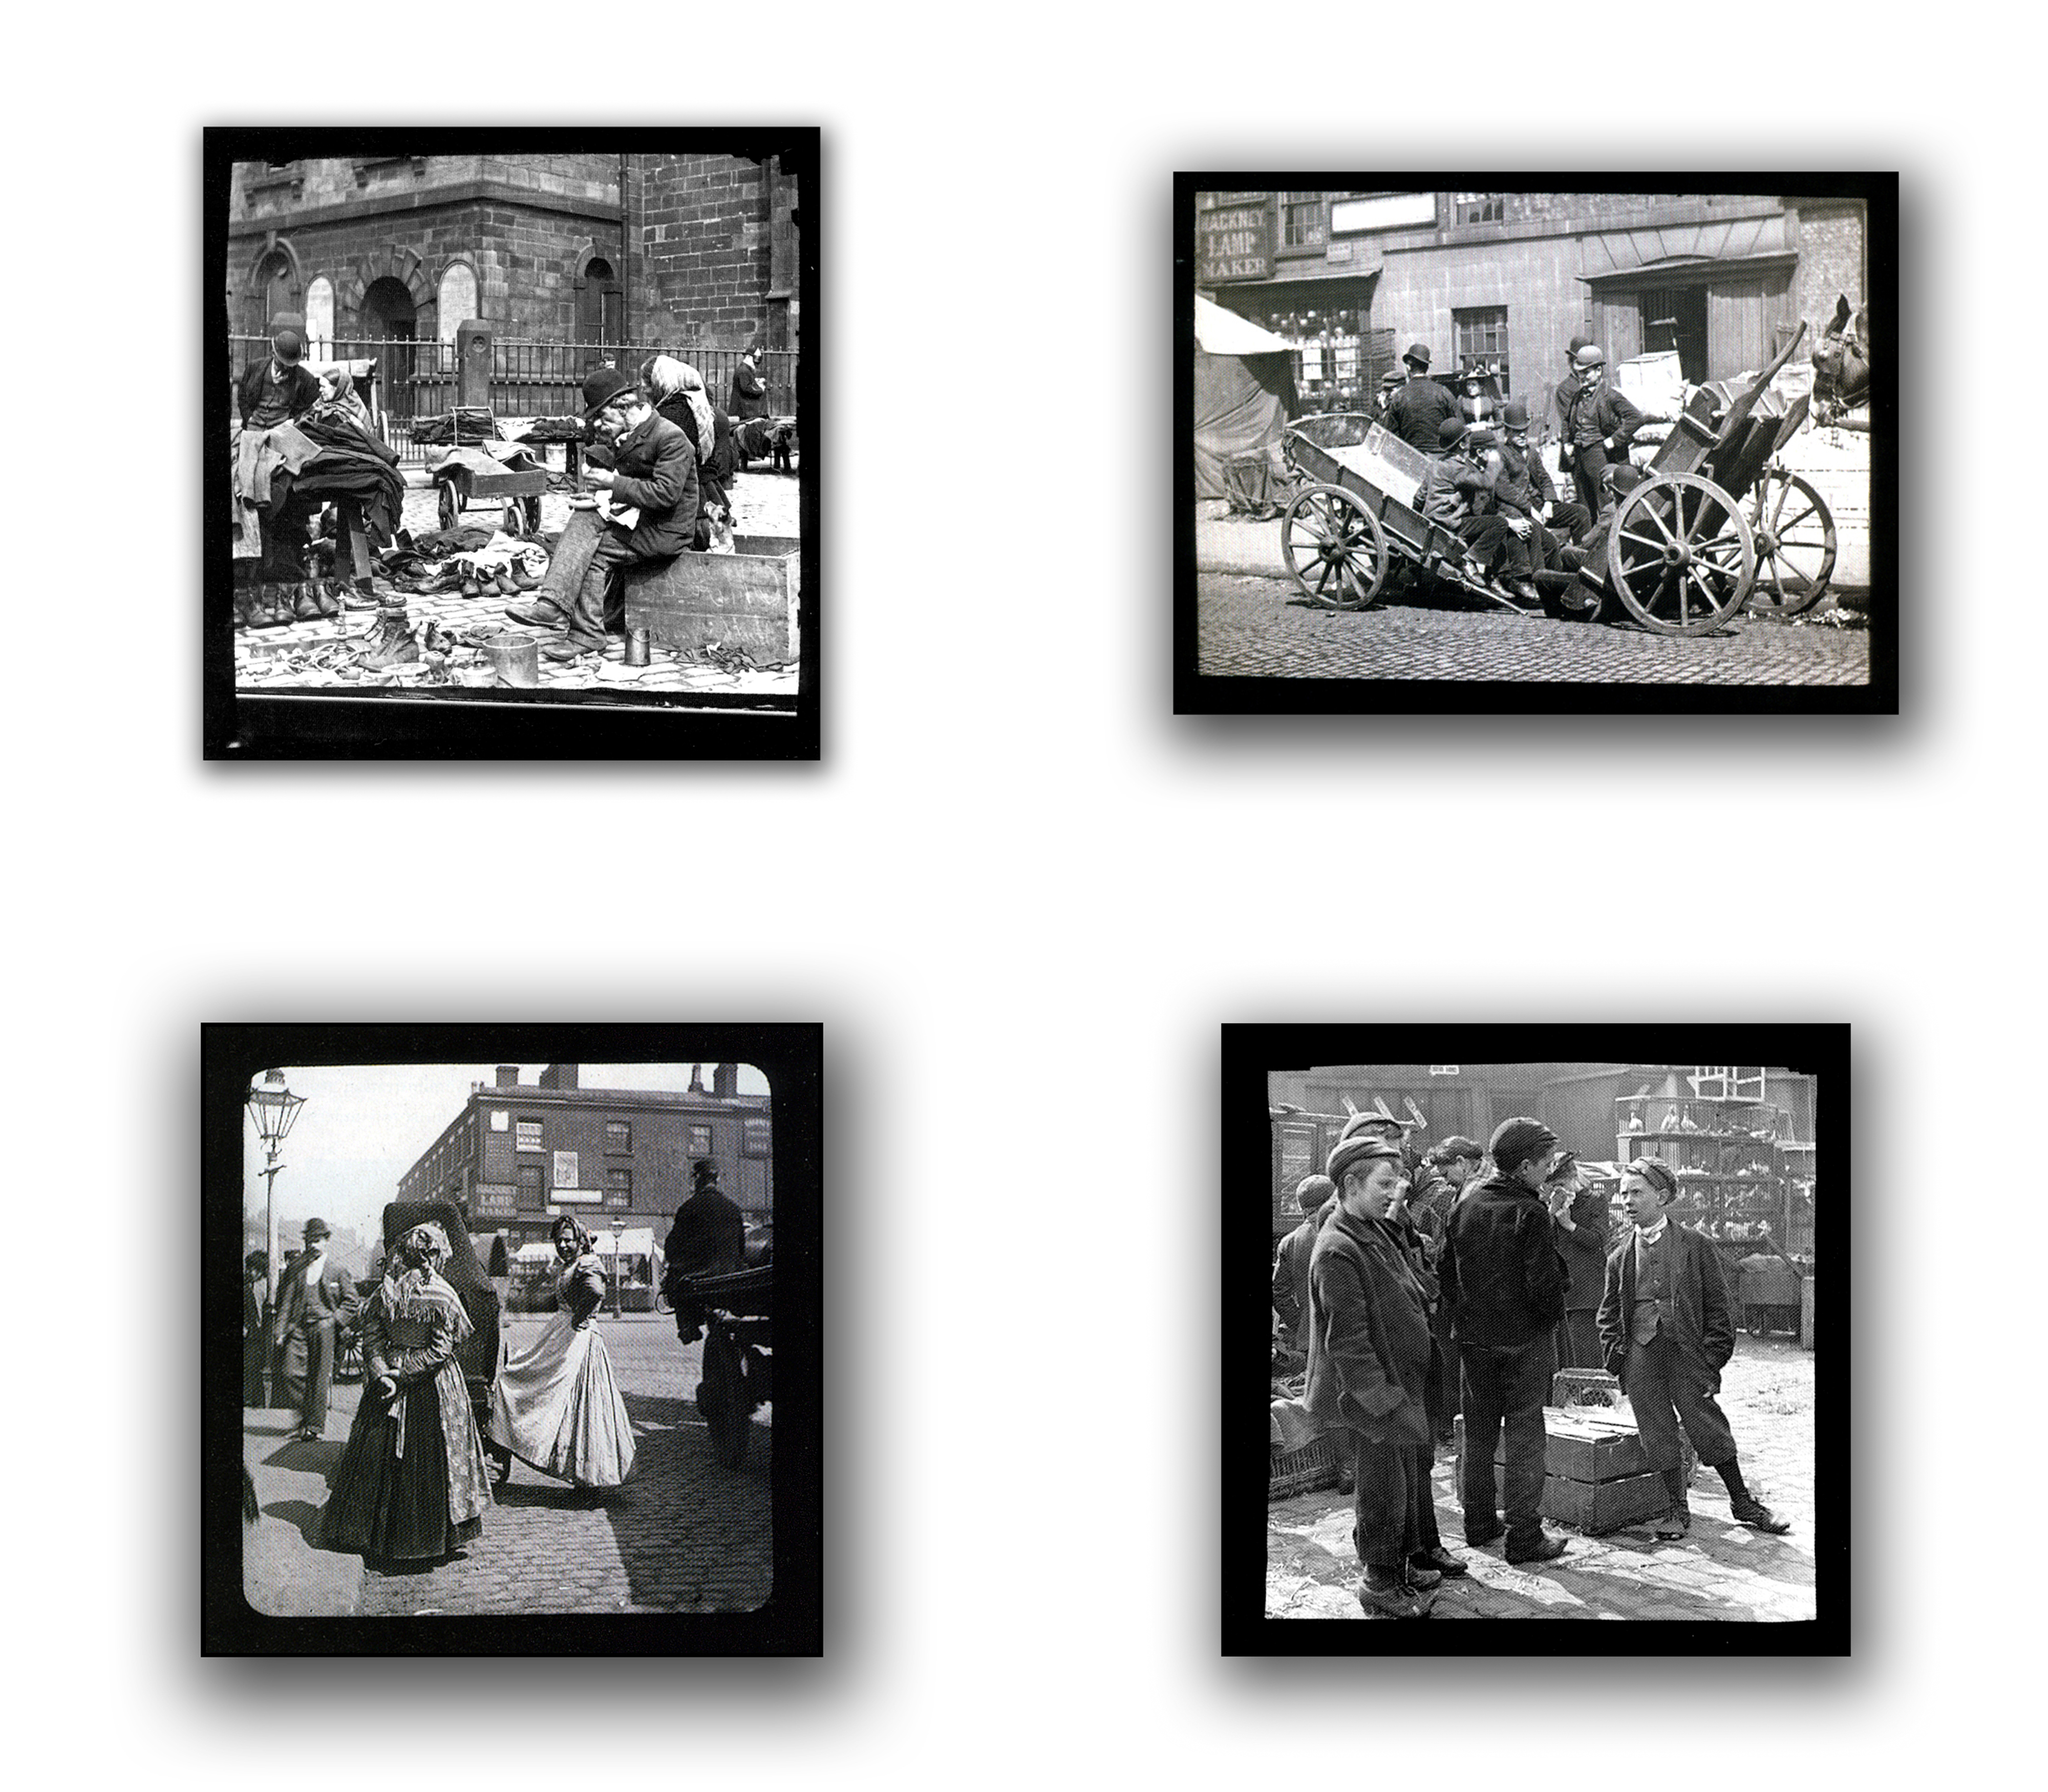
Samuel Coulthurst: Victorian Salford, Manchester(UK) – (1889 – 1890)
19th Century street photography
Back in 2002 I was back home in Manchester and visited the Lowry art museum and gallery at the Salford Quays, Manchester. This exhibition has stayed in my memory ever since so I thought I would share a post about the display of work I attended that day.
During a two year period (1889 and 1990), Samuel Coulthurst and his brother-in-law James Higson both members of the Lancashire and Cheshire photography union, dressed as what was known then as rag and bone men.
They carried their camera on the back of a cart they used and took many photographs of the people they met and got to know. Many of these photographs have been archived along with details of who these people were and what they did.
They were not simply doing a street walk about with a camera but spent time both living the lives and getting to know the people of Salford.
Many for the street children that the two photographed would have attended the Charter Street Ragged School, they had either lost parents to industrial accidents or to famine or disease. In the grounds of this church owned school is a grave yard that contains 6000 such parents. The city of Manchester has many such locations from this period.
It was in such conditions that these two photographers lived and worked taking pictures that made history. Without them most people would have forgotten in part at least, the kind of live’s that the 19th century people of Manchester lived including my Own Ancestors.
The exhibition is repeated by the Lowry Gallery so if you are in Manchester and into history/photography then maybe you could call in.
Gallery:
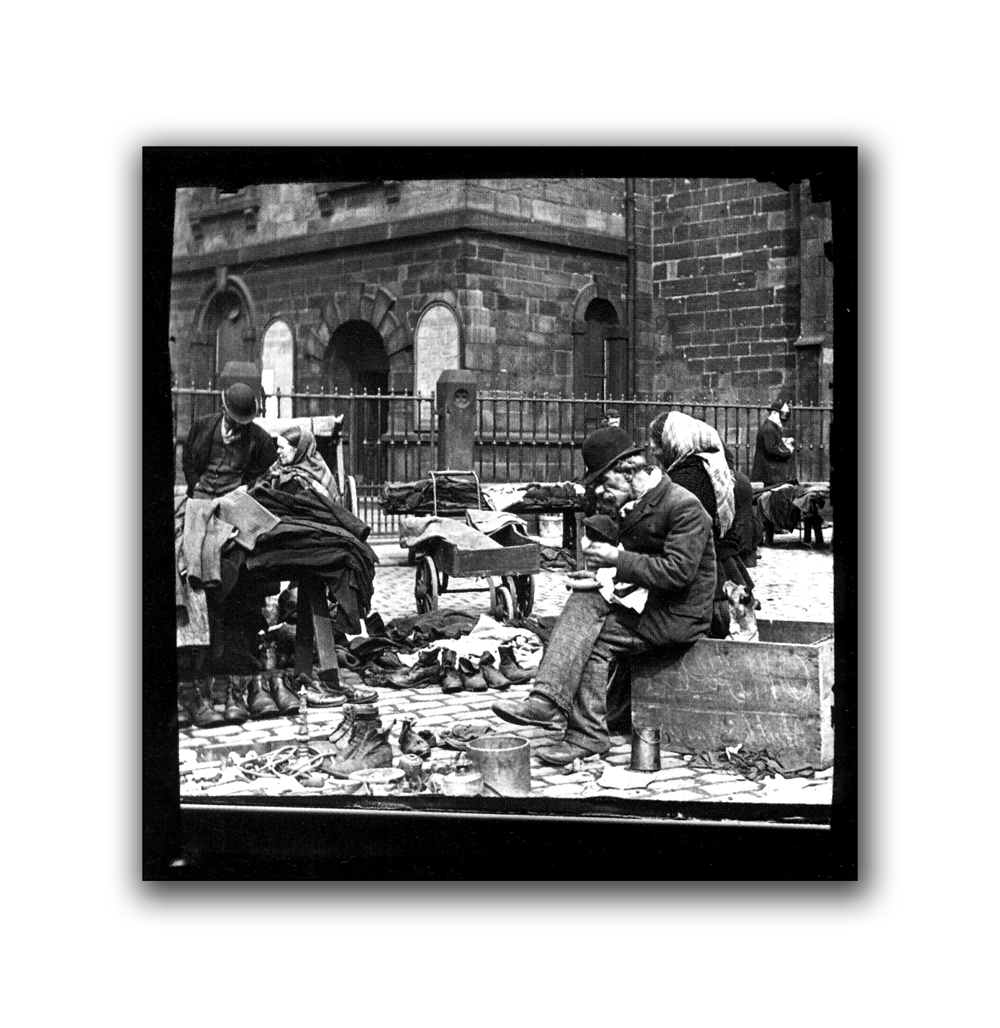
Flat Iron Market Salford. Manchester 1890.

Swan Street, Salford Manchester 1890.

Organ Grinder – Swan Street Salford, Manchester 1890.

Tom Shudehill, Poultry Market. Manchester 1890.
Dorothea Lange
As its a wet and slow afternoon I thought I would just do a quick post to pass on some study links for Dorothea Lange:
.
.
A biography worthy of its subject (Linda Gordon’s DOROTHEA LANGE)
@ The historian’s lens
One of the best people and documentary photographers of all time

No she didn’t go digital!
A great book on her work was published by Phaidon and written by Mark Durden (ISBN 0-7148-4619-8)
James Ravilious

Who was James Ravilious ?
“James Ravilious was an English photographer born in Southern England in 1939. He was the son of the artist Eric Ravilious and studied art himself at St Martin’s School of Art in London. James Ravilious took up photography in the early 1970′s, teaching himself, and he is most famous for his work for the Beaford Archive. The Beaford Archive was started in 1971 by Roger Deakins and was built into a collection of more than 80,000 images by Ravilious between 1972 and 1989 documenting rural life in North Devon. Ravilious’ photographs feature many everyday activities over the seventeen year period and provide a very interesting historical documentary about disappearing ways of life in rural England. James Ravilious was awarded Honorary Membership of the Royal Photographic Society as recognition of his contribution to photography in 1997. Ravilious died in 1999. His images are largely black and white and taken on film. By spending so much time with the inhabitants of the area and over such a long period of time Ravilious has managed to capture very natural looking images, as though he weren’t there in many of them or with the subject looking comfortable. From a single photograph his images all tell a story. His photographs include little objects or daily events that build a picture of their way of life. From each one you can imaging the scenario and more than just the moment at time when the image was shot. By shooting all year round his images also capture the moods of the seasons and the traditions of the year.
Images such as the one of John Bennett the traveller. The image captures the warmth of the season, and by including all of his belongings within the frame tells you lots of things about Mr Bennett’s lifestyle. You can pick out his walking stick, his boots, his pans and this all creates images within your head of Mr Bennett walking along a country lane with his belongings on his back, or perhaps cooking at the side of a stream. The image tells much more than a man lying on the grass in the sun.”
I like James work very much, A photographers lifetime in his work….
You see a great video on James work here:
Offical Web site:

Tamron SP 500mm f8 Reflex lens, a review of Mirror lenses
Tarmon SP 500mm F8 Mirror Lens, Real world review
When you make a start in the world of Photography, Sooner or later you will want to own a dedicated Long Telephoto lens. These lenses offer the ability to get some great images in the world of (Landscape, Wildlife, Portrait and Sports) Photography.
Fixed focus (None Zoom) Telephoto lenses come in many focus lengths, but the most usable are 200mm to 600mm, depending on how much magnification of distant subjects and objects you need. The cost of these lenses my surprise many starting photography and to be honest even many long term photographers, they can start in price range from around €800 and end up way into the many €1000’s.
There is however an alternative option with this type of lens, this being to look at what are called Reflex or Mirror Lenses. These kind of lenses replace some of the glass elements within their construction with two Mirrors both used to fold the light entering the front glass element in much the same way as a reflex telescope does.
i.e. NASA uses this method in the Hubble space telescope that has produced some amazing ground braking images of the cosmos.
Third party and OEM Camera manufactures started making these lenses in the 1970’s and continued through to the 1990’s, today mostly only third party lenses are available. The quality of these Early OEM/Third party – mirror lenses was very high, even second hand some of these lenses can set you back some €300 to €800 on ebay, even today in 2017.
Nikkor Reflex Lenses at 500mm, 1000mm and 2000mm
I purchased a Reflex lens made by Tamron (500mm SP F8) way back in 1988 and in this post I just wanted to share my thoughts on some of its upsides and some of its downsides.
To be honest, I have not used this lens very much, for two main reasons.
Firstly : at 500mm and with an lens aperture of F8 it needs to be Tripod or at the very least mono pod mounted in order to create very sharp images. This maybe a little unfair as this is true for most long lenses but Nikon VR lenses are so good at helping go handheld!
Secondly : these lenses have one very different down side to that of refactor (Glass only) lenses, they produce a doughnut ring effect on bright out of focus objects or even just areas in the image that have a bright, lighting than the darker areas around them. I have included some examples at the bottom of the posts images below.
With the first point above, today in 2017 with the high ISO abilities of SLR cameras such as the Nikon D7200 and D750, this issue has been made redundant to a great extent! When this Tamron lens was produced, 35mm film could only produce clean images at a rating of no more than ISO 400.
Today the Nikon D7200 can work very well between ISO 3200 and 6400 with very little help from good noise cleaning software in post processing, this up-rates the usable shutter speeds for hand held work for even a lens of 500mm at f8, letting you work handheld more than ever before !
Remembering that even on a DX sensor slr, you need for some 750mm (X 1.5 DX factor!) to keep a shutter speed of 1/800th to 1/1000th to create fully stable images, If you have a steady hand. Even on a cloudy day ISO 1600 gives a shutter speed of around 1/1600th and ISO 1600 on a D7200 is little to worry about! noise wise. It is for this reason that I am starting thinking of trying using this lens again.
For the rest of this post and review of the lens, I will let the following images do the talking, with a small amount of comments made in each of the related image types.
Tarmon SP 500mm F8 Mirror Lens – sharpness and quality
To test for the image sharpness and quality I placed the camera on a tripod, I don’t use a remote release, so there could be some small effects but all in all these are sharp images.
You can see from the below image that this lens can produce some very sharp images under the correct conditions, its just as good as some much more expensive glass only lenses from Nikon.
I have no worries here and would be very happy in trusting this lens to produce sharp images from corner to corner of the frame.
Above : Nikon D7200 with Tamron SP 500mm Mirror lens, Tripod Mounted
As image sharpness has been tested above, what about color fringing and other detects, color fringing is visible in an image at bright edges in the frame, so I used the wires and other equipment on the telegraph post in this image, I see no fringing Green, blue or otherwise in this image.
So again I would trust this lens to produce sharp and clean images that need little or no post processing to clean them up later.
Using the lens – in the Landscape
The following images speak for themselves, just general landscapes and animal images from medium focus distance subject to long distance landscapes, the town and wind farm in the last landscape is some 8km away from the location of taking the image, crazy!. Again its sharp enough taking into account the haze of the atmosphere, no color fringing problems in the wind turbines.
With the main set of images here, I am less happy with the out of focus effects as the bokeh of this lens is not great!, anything bright and a little out of focus (i.e. The grass!) takes on a distracted look, feeling tangled and distracting with the image smoothness, Most noticeable in the two images of the sheep sitting down.
Those Doughnuts !! OMG!
As you can see from the photo of this lens sitting in my camera bag at the top of the post, a mirror lens is constructed very much like a reflecting telescope, like this diagram :
Mirror lens
Physical construction
You can see that the center of the front glass element is used to hold the housing for the smaller secondary mirror in the construction, that folds the image light back down the lens and into the camera.
This system works amazingly well but for one problem!
For in-focus areas of an image the central lens obstruction is never visible, however for brighter areas of an image that are out of focus this central obstruction created by the secondary mirror housing, created a bright doughnut effect.
In the below images this is very clear!
The light gaps in the trees below turn into bright cycles, the rain on the table in the background focus also does the same.
In some images you can work around this effect and even use it as an interesting advantage?, you just have to get to know when this kind of lens is and is not usable !!!
For the most when you have a subject that has the potential to create this circle effect ! it just distracting and not likeable. This is the point at which the little price you paid to get a budget Telephoto lens €300 not €2000 starts to gets you back !!!
Getting Arty , MayBe?
Like any camera lens, Mirror lenses have their down sides (Slow, bright Cirles, Manual focus, etc …), you just have to get to know these features and ether use them to your advantage or don’t !!!
Some people love the bright rings and make good use of them 🙂 , one use could be nighttime street photography ?
So then ?
So if your looking for a cheep way to get a telephoto lens into your camera bag, a Mirror lens is well worth looking at in my own opinion. Don’t expect to work quickly with them or be lazy in your approach, however – but then most telephoto lenses need hard work to get good images, with a mirror lens you just have to add a little on top!
In the end, just like with all of your image making, you get out what you put in !!!!
Will I take this lens out more than I have? Maybe ! most likely not !! Watch this space ?
If I was starting again with few lenses and wanted a low budget long lens, would I get a Mirror lens , Hell YES !!! , With Great high ISO SLR’s even more so !!!
Sometimes the harder you have to work to get good images , the more you learn !!!!
Also see : Mirror Lenses – how good? Tamron 500/8 SP vs Canon 500/4.5L, a older review, ISO has moved a long way since this article but its a great comparison test (€300 Tamron v €2000+ Canon).
Share this:
July 21, 2017 | Categories: Camera Equipment, Camera reviews, Comment, Landscape, Nigel Borrington, photography, photography review, Photography Training | Tags: Landscape Photography, lenses, long lenses, Mirror lenses, Nigel Borrington, Photograhy equipment, Photography, photography equiment reviews, telephoto lenses | 3 Comments